Forum Replies Created

Viewing 15 posts - 481 through 495 (of 650 total)
  • Author
    Posts
  • Milky
    Keymaster

    Always a good idea to backup your config regularly, and certainly before installing an update. It is possible through the menu item Common > System > System Information > Backup Configuration. This saves all of the .ini files and can be restored if settings become corrupted.

    Milky
    Keymaster

    Please download version 3.19.42 – June 29th, 2018 and your prayers will be answered. http://www.breakawayone.com/downloads/

    Milky
    Keymaster

    I've seen nothing in the latest beta version release notes, but only Leif can definitely confirm. I know that he has been very busy in other areas of development.
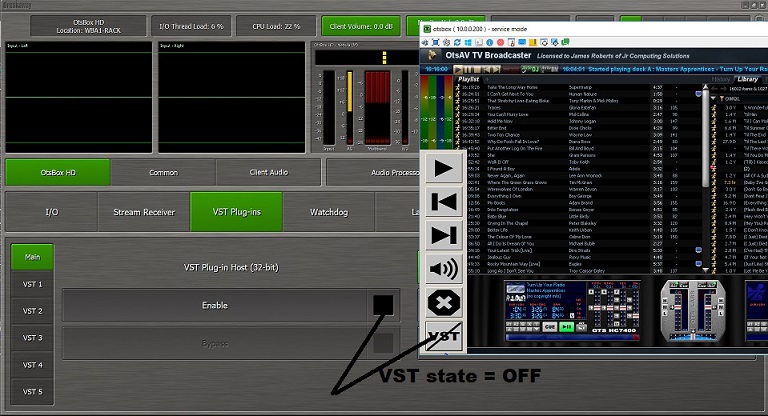
    Milky
    Keymaster

    VST OFF


    Attachments:

    Milky
    Keymaster

    VST (and vinyl preset) ON.


    Attachments:

    Milky
    Keymaster

    OK, we now have a working example of this great feature.

    Background:-
    We run a Community Radio Station, with many of the presenters trained only to operate the desk, but none of the playout interfaces. Most presenters play digital music through our software (OtsAVTV), but some still bring selections from their own record collections. This means, at the top of their program, we need to switch the soundcard from digital in (through Ots), to analogue in (via turntable), and in BA1, we also need to 1) change preset and 2) switch in a VST plugin which adjusts the RIAA curve for vinyl. To expect presenters to go into BA Remote and make the correct changes, and then do the same for the soundcard interface is way outside their levels of expertise.

    The Solution:-
    We have developed a simple overlay interface which sits on top of OtsAVTV and provides them with touchscreen friendly (and vision challenged friendly) transport buttons for Play, Pause, Next, Previous, using a simple programming language called "Auto Hotkey (AHK)" from https://autohotkey.com/download/. This has been working very nicely for quite some time, and even those who can operate the "normal" buttons in Ots say they prefer the larger buttons.

    We've now added another button to the group to interface with BA1 and automatically turn on the appropriate options. This VST toggle sends the commands to BA1 to select/deselect the VST plugin, plus change to a more vinyl sympathetic preset.

    Looking forward:-
    In the future, we will interface this directly with the turntable start/stop switch, so that the presenter doesn't even have to remember to set it up at the start of their program. The interface has been developed, using an arduino micro computer to sense the switch state and send the appropriate commands to BA1. Because it involves tampering with the equipment and is therefore a safety issue, we are waiting for the authorities to approve the changes before we can implement them, but an offline test rig is working very well.

    The next two posts are images of the ON state and OFF state, as when the VST button is pressed.

    in reply to: Need help with setup; manual available? #15038
    Milky
    Keymaster

    I happen to know that Leif is away until next week some time, so the dump file might have to wait. I have BA1 running all day every day without a hitch, but not with Marian Trace hardware, nor Windows 10, so there are two immediate variables.

    My experience is only with the HD core, so these instructions relate to that. I assume that other cores work similarly at the setup level.

    1) Launch BA1 Config from the shortcut menu.
    2) Click on "Main Configuration" then "Audio Processing Cores"
    3) Select HD Audio Cores. I find it easier to double click and then press the "+" button, but you can also drag the green bar from L to R to increase the number. I would start with just one to gain familiarity.
    4) Click on "Done" (if you went to the +/- screen) and then "Apply" in bottom RH corner. This will then display one or more (depending on the number selected) HD Processor buttons at the top.

    5) Click on "HD Processor" (or "HD 1", "HD 2" etc if you have selected more than one core.)
    6) To keep things simple, ignore the Livewire, Streaming etc options for now and define the input and output options. Click on "Input".
    7) There may be up to three options for Input. KS and Wave are standard, and an ASIO tab may show if the drivers are loaded (and the card is ASIO capable). For a fresh install, all are turned off by default, but, if you have been experimenting, or have migrated from another card, open each interface and ensure that the ones you DON'T want to use are turned off by selecting "Disabled" from the drop down box. So, if you have ASIO, that is the best option (less latency), followed by KS and then Wave.

    8) I'll assume that you are using the ASIO interface, because Marian Trace supports it. Now click on "Common Audio Devices". If ASIO drivers are detected, there should now be a button to select it. If it is not there, you need to install from the Marian Trace driver source.
    9) On the "Main" button, select the Trace card, set up the sample rate etc. If you click the "ASIO Driver Control Panel", it should open the Marian Trace setup screen where you can set the buffer size etc. When you close the Trace CP, you need to click the "Reload Driver" button which will refresh the screen and show the buffer size you have set.
    10) Again, set up the "Inputs" and "Outputs" in ASIO.
    11) Once ASIO is set up, you should be able to test the "circuit". Click on the "Main" button in ASIO setup and light up the "Run Test" button. Then click the "Test Tones" button and light up the "Left" and/or "Right" "Test Tones Output" buttons. You should hear a tone from each channel.

    12) If, for some reason, you want to use KS or Wave interfaces, the setup is similar. In my case, my playout software can only send the music source to BAOne via the Pipeline 1 (which can be installed separately from the downloads site). In this case, I have to define the "Pipeline 1" input in the KS interface.

    13) Select your default sample rate, and the sound device (in my case "Pipeline 1").
    14) Click on "Auto-configure Block Size". You can select the block size manually, but the Auto option usually comes up with a best fit.
    15) You can then Click on "Run Test" to give you an idea of how the card will perform with the selected block size. The aim is to get the jitter down to the lowest figure, but, in my experience, even 50% is acceptable, so long as you get no drop-outs or glitches. If the jitter figure it too high, manually select various block sizes and then test each time.
    16) Repeat this process after clicking the "Output" button. Select the output channel from the drop down menu e.g SPDIF. Once again, use the "Auto-configure Block Size" or manually select. If these two block sizes aren't set, you will get an error on the main screen later.
    17) For now, click the "Speaker" button and set it to "Disabled".
    18) You can ignore the "Label" button, or you can go in and give this HD core a meaningful name like "On-air", "Studio Monitor" etc.

    Most importantly, do NOT configure the same inputs and outputs in two or more interfaces. It will work, but you will hear "slap" from the interfaces arriving at the outputs at different times.

    That's about enough for one session. If you get this far, you should be able to play some music through the system, and then fine tune some of the other options.

    in reply to: Metadata OtsAV #15027
    Milky
    Keymaster

    I'll do some testing, but I seem to recall that DJ Buik did some work and wrote about it on the Ots forum. Have a look for that and I'll get back to you.

    Milky
    Keymaster

    Yes! Just about everything you can do directly through the BARemote interface screen can be done through the built in HTTP server. The first image above shows the opening screen, and all the syntax options are available. You just open port 8282 and you are in!

    in reply to: VST’s after AGC #15018
    Milky
    Keymaster

    Hi Hans. I was able to elicit this response directly from Leif Claesson, the developer of Breakaway One.

    That would actually be quite difficult. I can't run VSTs directly in the my process because then they could crash and take me with them, so I instead quarantine them in a child process. This is why 64-bit BaOne uses 32-bit VSTs by the way . This incurs delay though, and if they were to be inserted in the middle of the breakaway core, then we'd have to delay only the meters and patch points that precede them, or different parts of the GUI would be out of sync with the audio. It gets quite hairy to manage — I do in the Omnia.9 (and it was NOT easy) but there I am in control of the whole system, there isn't a way for the user to add things.. adding unknowns in that location is a can of worms I don't want to go near . What are these level-dependent VST plug-ins? VSTs have always been floating point in/out, meaning essentially infinite dynamic range, so I don't know why that would be a thing — I certainly haven't seen any.

    in reply to: BreakawayOne version 3.19.06 of March 27th #14991
    Milky
    Keymaster

    Leif has indicated that he is very busy and unable to visit here often, However, I was able to catch up with him in another group and passed your question on to him.

    Here is his reply:-
    Leif Claesson The BaOne FM core has multiple output slots, only the one labeled "MPX Output" is actually MPX out. The one currently configured must currently be one of the other slots — not MPX out. To get MPX out, either use a WDM device in the MPX Output Slot, or use Common Audio Devices – ASIO and select the sound card on the Main page, and what channel to use for MPX out on the Outputs page.

    By the way, if you use Speaker Out or Monitor Out, and select the MPX Out patch point, you will *hear* the test tones, but they won't be fit for doing any measurements or sending to a transmitter, as the MPX will be decoded to L/R and de-emphasized before being sent to the sound card.

    in reply to: Preset for Amateur Radio #14977
    Milky
    Keymaster

    Ah! So the USB connection feeds the output directly to your DAW. I assume that phantom power is supplied by the interface?

    As you say, it looks like you have to tweak an existing preset (much easier than starting one from scratch for mere mortals). Leif has indicated that a "real" manual is on the way, but that is still a way off, and may not address your needs anyway. In my experience, the development of presets has always been couched in "smoke and mirrors" and the privilege to develop them has been reserved for only the inner sanctum of devotees.

    My simplistic understanding is that you select an existing preset, then go into the EQ section and make adjustments. It then displays in BA1 with "(M)" after the preset, indicating that it has been modified. When you get it to your liking, you can save it as a different preset. You would probably need someone to read a script in their radio voice whilst making these adjustments. By trial and error, you may eventually arrive at the sound you are searching for.

    That's about the best advice I can offer. Hopefully one of the chosen few with more definitive knowledge will chime in.

    in reply to: Preset for Amateur Radio #14975
    Milky
    Keymaster

    Hi Don. Do you have any sort of external pre-processing of you microphones? The reason I ask is that, unless you are exclusively a "spoken word" station, the right preset for vocals is rarely the same as for music, no matter what genre.

    However, there are numerous devices specifically designed for vocal racks, where a thin sounding microphone can be made to sound really "fat", and the output can be mixed in with the rest of your program material.

    in reply to: new BAO V3.18.98: BaRemote how to #14979
    Milky
    Keymaster

    I'm not sure if you can remote to your local machine FROM your local machine. Why would you?

    I'll have a tinker with my copy and let you know what I find.

    in reply to: The next generation of Breakaway is here #14688
    Milky
    Keymaster

    BreakawayOne new version – [Most recent – 3.30.93 – 24th February, 2023

    Version Update History: Version 3.30.93 – 24th February,2023

    General Improvements:
    • Startup crash on some systems fixed
    • Input 2 level trim added
    • Monitor out separate Mute button added
    • Diversity delay now adjustable down to one sample
    • ReadMetadata watchdog grace periods extended to 10 minutes

    BreakawayOne Config:
    • WDM device buffer count can now be adjusted
    • Adaptive Sample Rate Conversion toggle switch added for each WDM device in config (was previously always on)

    FM:
    • FM MPX: Range-limited pilot level control added – 8.75 to 9.25%
    • FM BS-412 custom preset loading bug fixed
    • New Combo FM MPX test tone added. Combines quick sweep with 50 Hz square wave, for easy, at-a-glance transmitter calibration.
    • Combo Phase also added, inverts phase every second, to verify DAC, transmitter and modulation monitor LF performance.
    • RDS CT flag disabled, was not supposed to be on as the PC clock is not necessarily synchronized to anything

    Stream Receiver
    • Gain range increased, now -24 to +24
    • Stream receiver bug fixed – could skip when first receiving a stream from a server with long burst-on-connect

    Streaming Encoders:
    • https:// URLs supported as metadata source
    • Connection duration display added
    • Downtime duration display added (can be reset by double-clicking)
    • Number of encoders increased to 6 (mgmt package req’d)
    • Output Sample Rate now selectable
    • MP3 encoder output now 48 kHz if bit rate is 256 kbps or above and main processing is at 48 kHz

    GUI improvements:
    • Core / Instance buttons now revert to droplists before they get too small,
    • Core / Instance button tool tips implemented
    • maximize=xx command line option added (see BaRemote.txt)
    • BaRemote again works under WINE
    • BaRemote front panel mode custom size and position supported
    • Input meter (ITU-1770) numerical readout implemented

    Management Package improvements:
    • MQTT support (Homie v3.0.1 compliant) to allow for advanced automation and scripting. (mgmt package req’d)
    • Freeze Watchdog timeouts and grace periods extended to account for internet connectivity issues
    • BaRemote RTA display low frequency delay significantly reduced
    • File recorder added (mgmt package req’d)

    Livewire:
    • AES67 address display mode selection added

    Pass-Through Core:
    • PT core primary stream receiver now has preset buttons

    • This reply was modified 3 years, 1 month ago by Milky.
    • This reply was modified 3 years, 1 month ago by Milky.
    • This reply was modified 3 years, 1 month ago by Milky.
Viewing 15 posts - 481 through 495 (of 650 total)